
Mar 09•10 min read
Blockstack: How to -git- Involved
Now is a great time to get involved with Blockstack, and the main way to do that is through Github. There are three main organizations to pay attention to, as well as some of their repositories listed below.
Please note: This information is current as of 2020/03/09. For the most up-to-date information, please visit the individual organizations/repositories themselves.
Github Organizations / Repositories
Blockstack - the main development repo for Blockstack
blockstack-core (The Stacks 2.0 blockchain implementation)
blockstack-browser (The Blockstack Browser allows you to explore the Blockstack internet)
gaia (A decentralized high-performance storage system)
radiks (A client-side framework for building model-driven decentralized applications)
(and many, many more tools)
Blockstackers - the community repo for Blockstack
contribute-blockstack (the go-to resource for all Blockstack community projects)
Stacksgov - the community repo for Blockstack-related governance
resources (Resources related to governance of the Stacks blockchain)
updates (Regular updates on project status for the community)
survey (Stacks governance community survey)
project management (Project management related to stacks governance)
General git/Github Resources
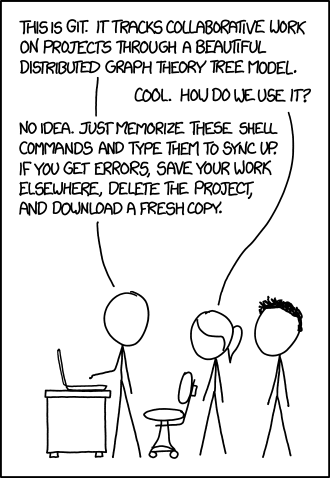
Image Credit: XKCD #1597: Git
Before I dive into what worked for me, I want to share a few resources that helped along the way. There is a ton of information out there about contributing to open source repositories (and some fun ones, at that).
Git Manual (the go-to for command and examples, unless you're the
mantype of person)Dangit, git! or its more unrefined counterpart Oh Shit, Git!?! (with real problems and solutions)
Gist: GitHub Standard Fork & Pull Request Workflow (Chaser324)
Also, my preference is to work from the command-line, however there are some resources for working directly from Github.com as well. Below are some great resources for learning what works best for you.
How to Contribute to Open Source (opensource.guide)
also, from the above: How to Submit a Contribution
Github Guides (short tutorials on specific topics)
Github Learning Lab (interactive exercises to reinforce concepts)
Individual repositories also (usually) contain a CONTRIBUTING.MD file to help with guidelines specific to that project. A few examples are linked from Atom, Ruby on Rails, and Open Government
This article assumes you already have a Github account, a computer with a working git installation, and the basic configuration between the two already done. For my setup, I chose the following options:
Using the
noreplyemail for commitsSigning commits with a GPG key
Terms and Definitions
There were a few terms that, looking back now, make a ton more sense if they are defined up front. Below are three words that deeply correlate to the rest of the instructions.
upstream: the original repository the fork was created from (on github.com)
i.e. stacksgov/resourcesorigin: the forked repository (on github.com)
i.e. whoabuddy/stacksgov-resources
local: the local repository (on the computer)
i.e. /path/to/the/file/on/disk (or c:\path\to\file on Windows)
Note: the definitions above are focused on people who plan to fork a project and submit changes back through a pull request because they do not have rights to the original project. If you are working with your own project/repository or maintaining a repository for an organization then the upstream bit can likely be left out.
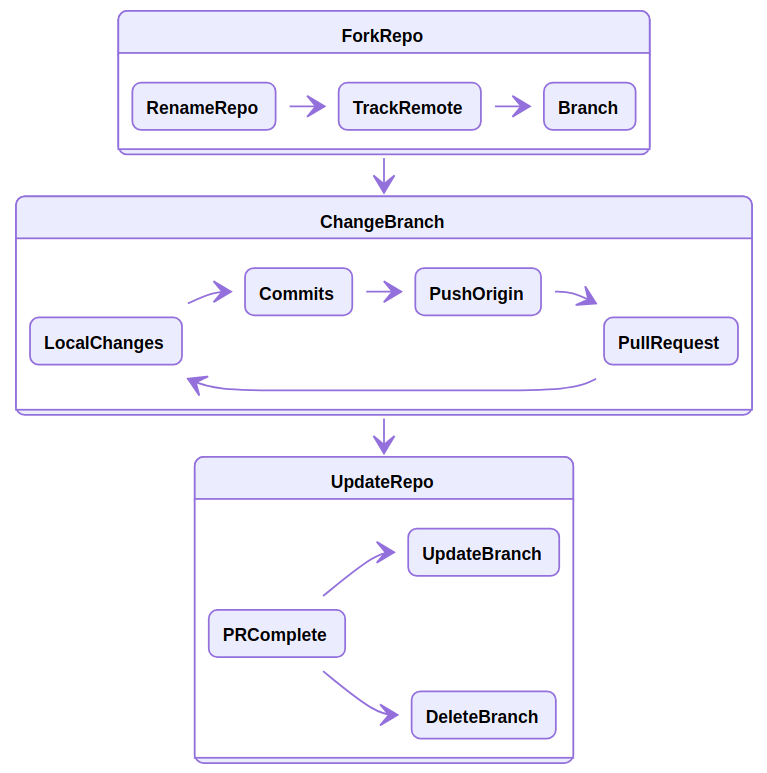
The Full Project Flow
When working with a OSS project, this process works best for me so far. Please note that < and > represent placeholders for data, and the actual brackets are not used as part of the command.
On github.com, fork the repository
(optional) Rename the repository from the Settings tab, I prefer a prefix similar to the org name (i.e.
bks-orstacksgov-)Clone the repository from Github to your PC
git clone <https/ssh address of fork> <local-folder>Change to the local directory
Mac/Linux:cd ./<local-folder>
Windows:cd .\<local-folder>Add the remote upstream repository to track changes
git remote add upstream <ssh-address of upstream>Create and checkout new branch to make changes
- one opinion on naming branches, several others available through search, I settled on a structure of "verb/intent" i.e.upd/resource-list feat/omni-auth fix/auth-flow
git checkout -b <branch-name>Make changes and add simple commit messages
- one opinion on commit messages, several others available through search, I believe short, sweet and informative is the goal.Less reading = more happyfor most people.atom <filename><-- or editor of your choicegit add <filename> or git add -A
git commit -m "<commit-msg>"Push the changes to the
originrepository on Github (your fork)git push origin <branch-name>On github.com, submit the pull request (PR) to the
upstreamrepository when changes are complete
Sometimes a pull request will require extra steps before going into review, which may include signing an agreement, testing the code, testing server deployment, or similar. If all checks are passed, then the PR is ready for review by the project maintainer.
During the review, a project maintainer may suggest (or make) edits, and once accepted, the PR will be merged into the main repository. At this point, the upstream repository (usually master) has the changes from your local branch (i.e. fix/bug-squash), but your origin/master and local/master branches are out of date.
To sync up with the upstream repository, follow the instructions below to perform a fast-forward (more explanation here).
Once the PR is accepted, or the upstream code changes, update the master branch from
upstream<-- always check what branch you are on!
git status
git checkout master
git fetch upstream master
git merge upstream/masterlocalrepo based onupstream<-- updates the
git push origin masteroriginrepo based onlocalFrom here, you have two options:
a. Delete the branch used for submitting the PRgit push origin -d <branch><-- deletes branch onorigingit branch -d <branch><-- deletes branch onlocal
b. Update the branch based on master for future usegit checkout <branch><-- updates the
git rebase masterlocal branchbased onlocal master<-- updates the
git push origin <branch>origin branchbased onlocal branch
Other Useful Tips and Commands
In addition to the workflow above, below is a list of tips, tricks, and commands that are very useful at various times throughout the contribution process.
Tips / Tricks
Take your time, especially when working from the command-line
Always create new branches from
master, otherwise you will make a big messDon't be afraid to test and learn, remember FAIL = First Attempt In Learning
It is common to chat with the community or create issues before submitting PRs
A branch for a PR can be submitted early as a Work in Progress (WIP), letting others know an issue is being worked on
Commands
git statusshow current working tree statusgit logshow commit logs
or:git log --pretty=format:"%h %s" --graphgit branch -ashow all branchesgit remote -vlist remote repositoriesgit mv <old-file> <new-file>move a file (change file name)git rm <file>delete a filegit commit --amendmodify last commit message
A Complete Walk-through
While putting together this post I ran into the perfect opportunity to update an issue on the Blockstack website as an example. I originally filed Issue #1035 regarding a broken image and link in README.md, but I only updated the link from my PR as I could not find a source for the image.
Now, after reviewing and seeing that all other Blockstack repositories do not have an image, I am going to propose a fix for the second half of the issue using that will remove the broken image (and close out #1035).
First off, I already have a fork of the upstream repository, but it is out of date.
blockstack/blockstack.org <--
upstreamrepositorywhoabuddy/bks-website <-- my fork (
originrepository)
Status (on Github.com):This branch is 12 commits behind blockstack:master.
I also have not set this up on my laptop before, so there is no local version of the repository yet. Let's get started by cloning my fork (origin --> local), then updating both origin and local with the contents from upstream.
Setting up the Local Environment
Remember to start from a working directory where you want to create project folders! I use a folder on my USB drive after the encrypted contents are mounted.
i.e.cd /media/$USER/mobivault/Dev
git clone git@github.com:whoabuddy/bks-website.git bks-website
cd ./bks-website
git remote add upstream git@github.com:blockstack/blockstack.org.git
git fetch upstream master
git merge upstream/master
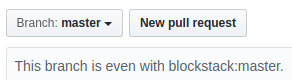
git push origin master
Now the status on Github.com shows: This branch is even with blockstack:master.
Making the Changes
Remember to always check what branch you are working from, and to always create new branches from master!
git checkout -b upd/readme(removed code for image at top of file, saved and closed)
atom README.md
git add README.md
git commit -m "removed image to match other repos"
git push origin upd/readme
Submitting the Pull Request
After pushing the changes, Github.com should recognize the new branch and recommend creating a pull request. An image like the one will show above the origin repository.

Clicking the button allows you to choose how you want the information to flow, as well as gives you a place to add additional comments to the repository maintainers. In this case, I make a quick note to the issue number (which automatically links to the issue in that repository), as well as links to the other repositories that I made my judgement call from.
The best practice is to try and keep these updates as short and meaningful as possible, while minimizing the amount of work a maintainer/reviewer has to do in order to publish.
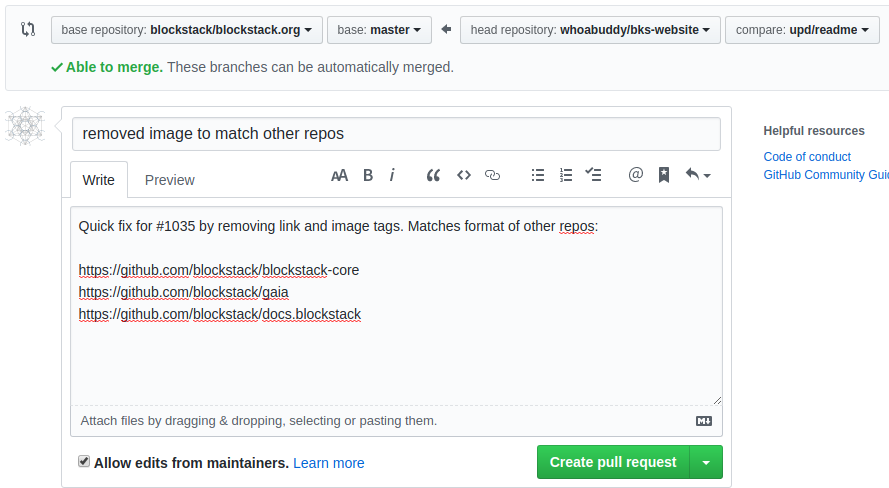
Finally, my last step is to click Create pull request and wait for a response!
Update 2020/03/11 - Pull Request Accepted!
Lo, and behold, the email notification arrived and my change was merged into the master branch!

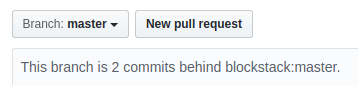
Now, we could use the big Delete branch button now that changes are complete, but wait a minute, we were doing this from the command-line! Also, you will notice that the forked (origin) repository is now out of date with the upstream repository.
Let's get that updated by taking the steps below.
cd /path/to/project/directory<-- always check what branch you're on!
git status
git checkout master
Note: at this point you will see some information that confused me the first time through.

Based on the terms defined in the beginning, this actually makes sense, both local and origin are up to date with each other.
upstream(main repo on Github)origin(forked repo on Github)local(local repo on device)
Our goal here is to update local with upstream, then push those updates to origin.
git fetch upstream master<-- performs a fast-forward if no conflicts
git merge upstream/master
git push origin master
Now the forked branch (origin) is up to date with the original repo (upstream), and all is well with the world.
For our final step, I no longer need the upd/readme branch, so I am going to delete it from origin and local.
git push origin -d upd/readme
git branch -d upd/readme
And, that's it! Now we are ready to move on to the next project, contribution, or cup of coffee to keep the day rolling.