
May 13•4 min read
Step 1: Running a Follower Node (Zero to Testnet Series)
NOTE! Argon is live now!
The second phase of the testnet, Argon, launched on 06/03/2020 so the instructions below are not 100% correct.
You can see the differences on the Testnet website, mainly to the start command, but the post below will remain up as a general reference to both the process I originally took with the Neon phase, as well as a basic outline of what's required to run a node on Argon.
Also, if you are interested in mining during the Argon phase, check out this repository with a one-liner script to get you online! It's much easier!!
Background
This series of blog posts will be broken up by topic based on setting up and using Virtualbox and Ubuntu Server to perform tasks as laid out on the Blockstack Testnet website.
- Step 0: Virtualbox + Ubuntu (Zero to Testnet Series)
- Step 1: Running a Follower Node (Zero to Testnet Series)
<-- you are here - Step 2: Running a Miner Node (Zero to Testnet Series)
As the testnet website expands it is my hope to expand this series as well documenting my experiences.
Prerequisites
Before we run the Blockstack testnet node, there are a few things we need to complete. A lot of this information can be found in and will follow along with the Blockstack documentation under Run a Stacks Testnet Node.
Install Ubuntu Packages
Since we are using Ubuntu, we need to install some packages before installing Rust or anything else.

At the terminal prompt:
- Type in:
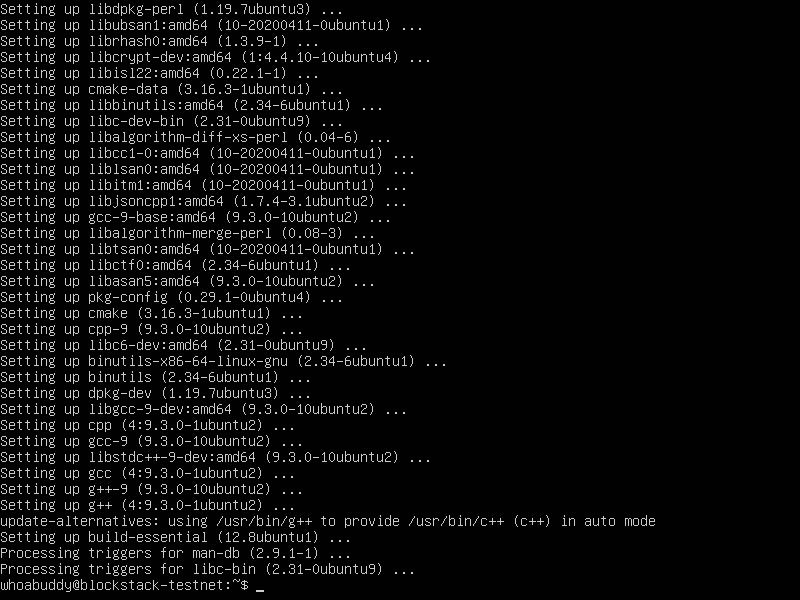
sudo apt-get install -y build-essential cmake libssl-dev pkg-configand press Enter - Type in your sudo password and press Enter
- The installations will process automatically, and once complete you will be at a blank command prompt again
Install Rust
Next, we install the Rust programming language.

At the terminal prompt:
- Type in:
curl --proto '=https' --tlsv1.2 -sSf https://sh.rustup.rs | shand press Enter - The installation script will display some information about the default settings for installation, as well as prompt for input.
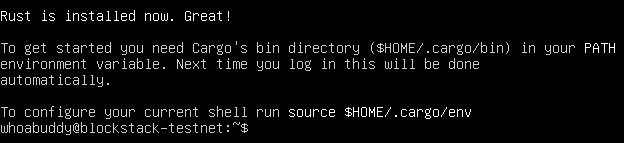
- Type 1 and press Enter to proceed with the installation (default).
- When the installation is complete, you will receive confirmation and be at a blank command prompt again
- Before you can use
cargoand other Rust-related commands, type in:source $HOME/.cargo/envand press Enter


Clone the Repository
Next, we download (clone) the files required to run the Blockstack Testnet node from the Blockstack Github repository.

At the terminal prompt:
- Type in:
git clone https://github.com/blockstack/stacks-blockchain.gitand press Enter - Type in:
cd ./stacks-blockchainand press Enter
🎉 Congratulations, if you made it this far then you are ready to run a Blockstack Testnet node! ☕
Running the Node
The instructions here vary slightly from the Testnet instructions, and should provide a more stable experience. Instead of installing the testnet to a local directory, we use cargo to build the testnet then run it, using the command below.
- Type in:
cargo testnet neonand press Enter - Rust will compile and start the node, which takes an average of 5-10 minutes depending on your configuration and available memory
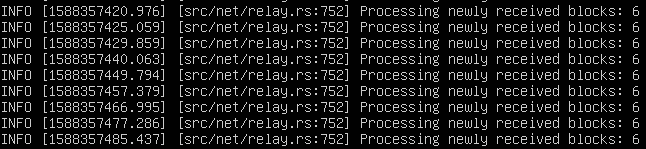
- When the node starts, a message similar to this will be seen containing
First-ever block:


That's it! The Blockstack Testnet node is now officially up and running, and the screen will continue to update with information as the node processes transactions from the network.
Note: If you want to run the testnet with debugging enabled, change the command above to RUST_BACKTRACE=FULL BLOCKSTACK_DEBUG=1 cargo testnet neon, however this results in significantly more output on the screen and can be difficult to read. If you run into any errors, please search for or file an issue on the Blockstack stacks-blockchain repository, or reach out to me on the Blockstack Discord - @whoabuddyPulling in Changes (Updates)
From time to time we will need to pull the most updated code from Github to run our node. Follow the instructions below to stop a running node, update the code, and start it again.
- Using the keyboard, press
Ctrl+Cto stop the node. A blank terminal prompt should appear. - Type in:
git pulland press Enter from the./stacks-nodefolder to download and apply the latest changes - Type in:
cargo testnet neonto start the node again