May 20•7 min read
Step 2: Running a Miner Node (Zero to Testnet Series)

NOTE! Phase 2: Argon is live!
The second phase of the testnet, Argon, launched on 2020/06/03. As a result, there is a new configuration file, but the steps to set up a miner node are very similar. The instructions listed in this blog post were updated on 2020/06/23 to reflect the new steps required.
The Easy Way
Instead of walking through all of the instructions below, I created a one-liner script that works with Ubuntu Server 20.04 LTS. I chose this operating system since it only requires 1gb of RAM in a virtual machine to run, making it very easy to test out mining without making any changes to your current system.
If you follow the instructions in Step 0: Virtualbox + Ubuntu (Zero to Testnet Series), or if you already have a Ubuntu Server installation to work with, you can simply run the command below to set up your miner and it will take care of everything for you.
curl -o- https://raw.githubusercontent.com/AbsorbingChaos/bks-setup-miner/master/config-miner-argon.sh | bash
In addition, you can stop your miner with CTRL+C and run the script again to download any updates, or to restart the miner after a chain reset. You can also check the current status of the Stacks Blockchain via this website.
More information on the command above can be found in the related GitHub repository, and it should work with any Ubuntu-based system. If you run into any problems/errors, feel free to open an issue here.
To see a video of the script in action, check out this YouTube video!
Background
This series of blog posts will be broken up by topic based on setting up and using Virtualbox and Ubuntu Server to perform tasks as laid out on the Blockstack Testnet website.
Step 2: Running a Mining Node (Zero to Testnet Series)
<-- you are here
Note: This process is fairly similar to Step 0 + Step 1, with some extra steps to start mining. To help make a clear tutorial from start to finish, I started from Step 0 and set up a new VM for this. The instructions here will follow Step 0 but some of the content will be similar to Step 1.
Prerequisites
Virtualbox Configuration
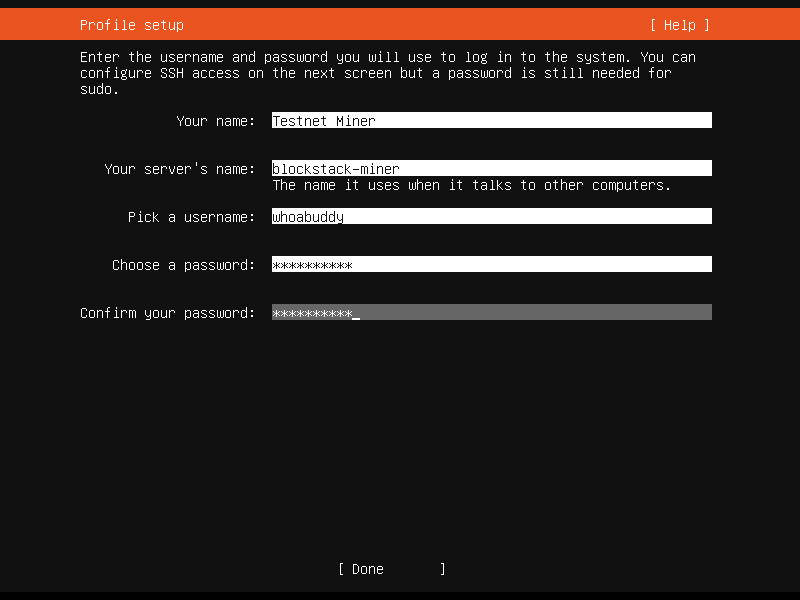
Since this is a new virtual machine, the settings below vary slightly from the original Step 0, otherwise the process of setting it up are the same.

Your name: Testnet Miner
Your server's name: blockstack-miner
Pick a username: whoabuddy
Choose a password: Love2test!
Confirm your password: Love2test!
Install Ubuntu Packages
First, we start with the same dependencies as Step 1 for Ubuntu.
At the terminal prompt:
Type in:
sudo apt-get install -y build-essential cmake libssl-dev pkg-config jqand press EnterType in your sudo password and press Enter
The installations will process automatically, and once complete you will be at a blank command prompt again
Install Node.js via NVM
The blockstack-cli package we will use requires a few extra dependencies, mainly node and npx. One common way to install Node.js is via the Node Version Manager.

At the terminal prompt:
Type in:
wget -qO- https://raw.githubusercontent.com/nvm-sh/nvm/v0.35.3/install.sh | bashand press Enter
Note: that's the letter O not the number 0 forwget!After the installation, the
nvmcommand is not immediately available. Instead of editing the~/.profilefile and reloading it, the faster method is just to reboot the VM.Type in:
sudo reboot nowand press EnterTo confirm the
nvmcommand is available, type incommand -v nvmand press Enter, this should output:nvmUse NVM to install node by typing in:
nvm install nodeand press EnterTo confirm the
npxcommand is available, type inwhich npxand press Enter, this should output something similar to:/home/whoabuddy/.nvm/versions/node/v14.3.0/bin/npx
Install Rust
Next, we install the Rust programming language.

At the terminal prompt:
Type in:
curl --proto '=https' --tlsv1.2 -sSf https://sh.rustup.rs | shand press EnterThe installation script will display some information about the default settings for installation, as well as prompt for input.
Type 1 and press Enter to proceed with the installation (default).
When the installation is complete, you will receive confirmation and be at a blank command prompt again
Before you can use
cargoand other Rust-related commands, type in:source $HOME/.cargo/envand press Enter
Clone the Repository
Next, we download (clone) the files required to run the Blockstack Testnet node from the Blockstack Github repository.

At the terminal prompt:
Type in:
git clone https://github.com/blockstack/stacks-blockchain.gitand press Enter
Create and Save the Keychain
Next, we generate a keychain using blockstack-cli that gives us our wallet addresses for STX and BTC. We will output this information to a file then view it rather than just running the command, as we will need to reference this information at different points in the process.

At the terminal prompt:
Type in:
npx blockstack-cli@1.1.0-beta.1 make_keychain -t > keychain.jsonand press Enter
Note: there will be a lot of scrolling text as this command installs the node.js package first, then runs themake_keychain -tcommand afterward.To verify the file exists and view the contents, type in:
cat keychain.jsonand press Enter
Note: I am sharing these images as part of the zero to testnet series, but in mainnet (or 99.999% of other situations) you want keep these keys PRIVATE.
Request Tokens from the Faucet
Now that we have our wallet addresses, we can request test BTC ("tBTC") from the faucet. Normally this is done via the Testnet Faucet website, but since we do not have a GUI on Ubuntu Server, we can use curl instead.

Note: Since this method requires manually typing in the information anyway, another alternative is to navigate to the websites above and manually enter the btcAddress value. As part of this tutorial, I am going to keep things in scope of working directly from the VM.
At the terminal prompt:
Type in:
curl -X POST https://sidecar.staging.blockstack.xyz/sidecar/v1/faucets/btc\?address\=`jq -r '.keyInfo .btcAddress' keychain.json`and press Enter
Note: thejqcommand is wrapped in back-ticks and takes the BTC address from the keychain file and inserts it into the request for you. You can also manually type the address, but if you miss a character, you won't get the tBTC!After pressing Enter, a JSON-formatted result will be displayed similar to the one below, if you see
"success":truethen the request was successfulWait about 1-2 minutes for the tBTC to arrive (☕ break)
Download a copy of the argon miner configuration file, shown in this section of the docs, using a copy hosted on my GitHub page for AbsorbingChaos. Type in:
curl https://raw.githubusercontent.com/AbsorbingChaos/bks-setup-miner/master/argon-miner-conf.toml --output $HOME/stacks-blockchain/testnet/stacks-node/conf/argon-miner-conf.tomland press EnterReplace the text for
seedwith your private key that we generated earlier, using a super fancy combination of Linux commands. Type in:sed -i "s/replace-with-your-private-key/`jq -r '.keyInfo .privateKey' keychain.json`/g" ./stacks-blockchain/testnet/stacks-node/conf/argon-miner-conf.tomland press Enter
Note: pay special attention to the single quotes, double quotes, and back-ticks used in this command!Change to the
./stacks-blockchaindirectory so we can run the cargo command to start the miner, type in:cd ./stacks-blockchainand press EnterRun the miner using the configuration file we downloaded and edited from the commands above, type in:
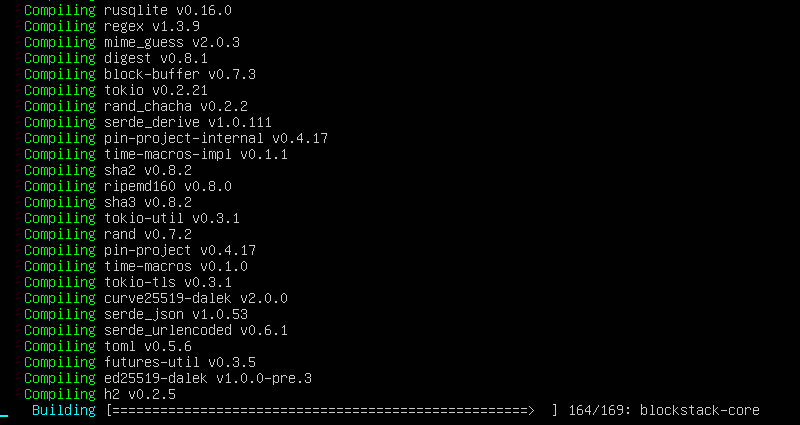
cargo testnet start --config ./testnet/stacks-node/conf/argon-miner-conf.tomland press Enter
Sit back and let the mining begin!
